Creating a DIY flower wall is an easy way to add some color and life to any special event.
In this DIY flower wall tutorial, we’ll teach you how to make your own faux floral backdrop for weddings, parties, or special events of all kinds.
Follow along with our 6 easy steps and by the end of it, you’ll have a beautiful addition that’s sure to wow guests.
Contents
This post contains affiliate links. See our full disclosure here
What Is A Flower Wall?
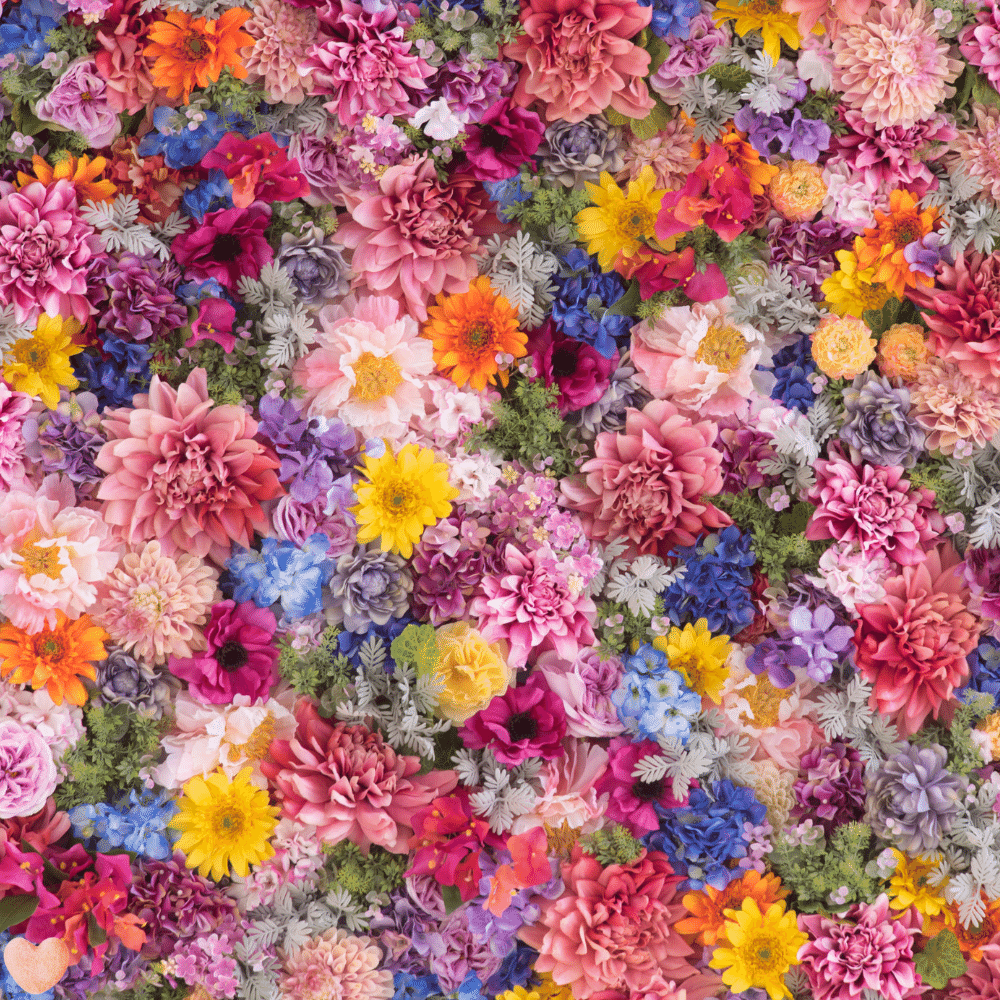
A flower wall is a backdrop of beautiful flowers arranged closely together on either a wire mesh or foam board.
Aside from adding a beautiful pop of color to your event, a flower wall creates the perfect background for beautiful photographs.

How Much Do Flower Walls Cost?
When buying a flower wall online, they usually come in individual panels that you connect together to create the size of flower wall you require.
Each panel usually costs approximately $30-$50 and measures 16″ x 24″.
So for a large wall, you could be looking at a cost of up to $700 to $1000.
How Much Does A DIY Flower Wall Cost?
The great news is, making your own flower wall is super easy to do and extremely fun too!
Oh, and the best news?
A DIY flower wall can be made at a fraction of the cost of a premade one!

We’ve found these stunningly beautiful flowers on Amazon that would be perfect on any flower wall and are reasonably priced too!
You can also shop for flowers from Hobby Lobby, Lowes, Ikea, and even the Dollar store.
We’ve managed to find bunches of silk flowers for just a couple of dollars at our local stores.
We recommend using approximately 50 flower heads for each 16″ x 24″ area.

Different Types Of DIY Flower Walls
There are many different ways to make a flower wall, however, our favorite 3 methods are…
1. Foam Board Flower Wall
You can make a flower wall with a slab of foam or some squares of foam board.
For this method, simply cut the stems off of the flowers and use a hot glue gun to secure the flowers to the foam board
2. Wire Mesh Flower Wall
A wire mesh is heavier than the foam board flower wall but is as easy to assemble.
For this method, simply use wire to secure the flower stems to the wire grid.
3. Flower Wall Panels
These mesh panels are designed specifically for flower wall backdrops and are another budget-friendly option to create your beautiful flower wall.
You can use cable ties to connect these panels together, making them the perfect option for easy transportation and assembly on location.

Where Can Flower Walls Be Used?
Flower walls are so perfect for weddings but equally, make the perfect backdrop for many special occasions including…
- Anniversaries
- Birthday celebrations
- Christenings
- Work do’s
- Christmas parties
and even within the home as a stunning feature wall for a bedroom or nursery.

There really are no limits to where you can display your beautiful flower wall it’s guaranteed to be a great conversation starter!
DIY Flower Wall Supplies
To make your very own DIY flower wall using plastic mesh panels, you will need…
- Plastic mesh panels (enough for your required size)
- Cable ties
- Florist wire
- Faux flowers
- Greenery
- Command hooks (to hang on the wall)
DIY Flower Wall Tools
- Wire Cutters
- Hot Glue Gun *Optional
Tips For Creating A Stunning Flower Wall
Making a flower wall is great fun to do and the simplicity of it makes it the perfect craft project for both beginners and expert crafters alike.
We know you’ll have a blast creating a beautiful flower wall for your wedding, and here are some tips for you to ensure success!
1. Get Prepared Before You Begin
There’s nothing worse than sitting down to start a craft and having to stop to source supplies you forgot to buy.
You will find the whole process far more enjoyable if you sit down to create your flower wall in a tidy, organized space with all your supplies and tools to hand.

2. Space Similar Flowers Evenly
If you’re using a variety of different flowers then be sure to space similar flowers evenly around your board to avoid clumping flowers that look the same together.
3. Lay Out Your Design On A Flat Surface Before Securing Any Flowers
Before you begin be sure to lay all your flowers out so you can establish what looks best before you secure them to the panels.
4. Fill Gaps With Faux Greenery
Adding greenery to your flower wall is a great way to make the colors of your flowers pop and is the perfect way to fill up all the gaps between your flowers and make the wall look alive and lush.

5. Get Creative
Don’t be afraid to have fun and get creative with your flower wall.
From pinks, blues, reds, and purples to a rainbow or ombre design, there’s really anything you can achieve with a flower wall.
We also love this hanging look too…

Why not give it a go for your big day?
So, are you ready to get started on your stunning DIY flower backdrop?
Let’s go…

Step 1
Gather all your supplies.
Step 2
Lay all your flowers out on a flat surface and arrange until they look pleasing to the eye.
Step 3
If you’re assembling your flower wall in one large piece, secure the panels together now using cable ties. If you’re intending to join your separate panels together in a different location (which can make transportation easier), skip this step.
Step 4
Starting from the middle of each panel, thread the stem of a flower through the mesh, and secure it using florist wire.
Step 5
Cut any excess stems from the flowers using your wire cutters
Step 6
Fill any gaps between your flowers with greenery.
Step 7
Once your panels are full, secure to the desired location with either command hooks or nails and admire!
